


By Joshua Pierce, Head of Education at Credo
Cover credit: Westman Atelier
We’ve hoped this day would come for quite some time. For YEARS we’ve conducted surveys asking our clients what they’re interested in. And for YEARS the Credo community has been very loyal to focusing on skincare and complexion products. The tides have changed and a new era is upon us. YOU, the Credo community have made it very clear to us that you are ready to learn more about every makeup artist’s favorite topic: eyes, eyes, eyes!
There’s no limit to the creative depths you can take with your eye makeup looks. You can go the moody Marilyn Monroe route with sweeping lashes and dreamy winged eyeliner. Or you can vamp up any look with sultry smokey eyes. Pick your favorite look and rock it day in and day out… or maybe choose your own adventure every day by switching up your look based on the current trends.
Today, we’re going to take you through an easy step-by-step eye makeup tutorial to achieve one of the hottest eye makeup trends of the year: metallic eyes! Follow along with me in this eye makeup tutorial as we talk about key products you will need, pro tips on how to apply them, and the secret tools you need to master the final look.
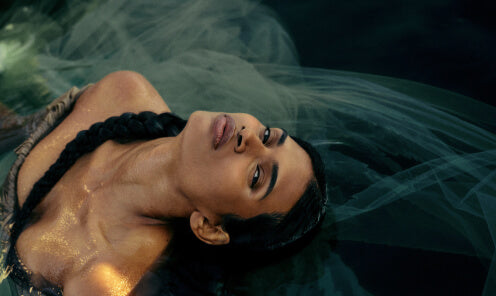
First thing’s first: be not afraid of the metallics. Metallic can be whatever level of shine you want it to be. This blog will be focusing on high-glam-over-the-top-shine eye makeup looks. But, you can easily customize the look by using any level of shiny shadow you’re comfortable with. We love a metallic look at Credo because it brings sparkle and shine to the eyes, giving them an instant pop of life and vitality.
Step One: Oculus Prime
Let’s get this eye makeup tutorial started! You’re about to apply several shades of shadow to your peepers. All of that work will be in vain if you don’t prep the eye with a layer of primer. Primer will hold your shadow on like double-sided tape, preventing creasing, smudging, and shadows that slip-and-slide. Our beloved Exa Splashzone Oil Free Hydrating Primer is a treasure when it comes to priming any part of the face.Credo Pro application tip: For the eyes, pump out a teeny bit of the primer (about the size of a grain of rice) and apply it evenly across both eyelids, into the crease of each eye, and to the browbones. Let the primer dry before moving on to the next step. Try applying the primer with the Kjaer Weis Concealer Brush.


Step Two: It’s All About That Base
Here’s where your eyes will mesmerize. We start applying eyeshadow by focusing on the eyelid. To maximize on the dimension of the eye and the shimmer in the metallic shadow, you will apply your base shade only to the eyelid. This means from the lash line to the crease. Pick your favorite shimmery shade and go to town! Neutral metallic shades are what our clients in our stores have been craving. Check out the Roen 75° Warm Eye Shadow Palette for a range of stunning metallics that are perfect for this easy step-by-step eye makeup tutorial.Credo Pro application tip: For shades on the eyelid you want an opaque color application. This is best achieved by using a brush that is very dense as it will press the shadow into the lid for longer wear. Using a dense shadow brush like RMS Eye Shadow Brush, tap the color across your eyelid, from corner to corner, stopping at the crease of the eye.


Step Three: Come Into the Light
The key to mastering eye makeup looks is to start with your lighter shades and end with your darkest. You can always make eyeshadow darker by layering on deeper shades. However, if you go too deep by starting with the darker shades, the only way to fix it is to wipe everything off and start over.We want your eyes to dazzle and dance as if lit by candlelight. So, apply a light satin/shimmer shade to the inner corners of the eyes (tear ducts) and across the brow bone. Any shade that is a tad lighter than your flesh tone will do the trick. Westman Atelier Eye Pods are the perfect texture because they add just the right amount of shine.
Credo Pro application tip: To make sure you go easy on the brow bone shine, try switching to a fluffy blush for applying your lighter shades. Jenny Patinkin Eye Shadow Brush has the ideal amount of fluff to allow for a lighter pigment deposit.


Step Four: Blend, Blend, Blend
A great makeup artist trick is to use a “blender shade” of matte eyeshadow between your metallic base/eyelid shade and your brow bone highlight. For this, you want to reach for a shadow that is a little bit deeper than your skin tone. This flesh tone shade creates a buffer for your deeper shadow shades in the next step. This will make it MUCH easier to build in your darker shades. A matte texture is best for eyeshadow in the crease because it will create depth. PYT eyeshadow palettes are a staple in any makeup bag because of their wide range of matte flesh tones.Credo Pro application tip: Using a clean Jenny Patinkin Conceal and Buff Brush, apply your flesh tone matte shade into the crease of the eye, starting at the outer corner. With a “windshield wiper motion” blend the shade from the outer corner to the inner corner, keeping the brush in the crease of the eye. This super fluffy brush is fantastic for soft eyeshadow application. You may be thinking it’s odd that I would recommend a brush that says “conceal” for eyeshadow. I almost always ignore the name of a brush and focus on the bundle of fibers. Fluffy brushes are the go-to for blending. Dense brushes are for packing on color. The name is just a name at the end of the day.


Step Five: Getting Shady
Now that you’ve got your beautiful shimmer on the lid and you’ve eased your way up to your darker shadows, it’s time to really build some drama onto these lids! Applying dark shadows is where things can go off the rails pretty easily. Lucky for you, you’ve layered in that matte buffer shade that will make your deep shades look more blended without having to do much work at all. Pick a shade of shadow that is 3-4 shades darker than your metallic base color. It’s important to match the texture of the base. If you went with a high shine then your deepest color should be a high shine as well. Typically, shadow palettes will have complimentary shades that layer well on top of one another.Credo Pro application tip: Apply the deepest shade to the outer corner of the eye (on the eyelid). A small definer brush is what you want to use. Tap the shadow in a triangle shape in this area to create shadowy depth. The Vapour Crease Brush is the perfect tool for this job. After you’ve applied the color to the outer corner, sweep any remaining shadow onto your lower lash line for subtle definition.


Step Six: Lash and Line
All that’s left in this eye makeup tutorial is the finishing touch of eyeliner and mascara. For daytime, the obvious choice of eyeliner would be softer browns. But why not live a little!? Pump up the jam with any shade of liner you want. Ere Perez has a huge shade range of pencils that glide on super smooth. Polish off the look with a couple of coats of Exa ten18 Lash Amplifying Mascara.
Credo Pro application tip: Applying darker eyeliners into the waterline of the eye will make your eyes look whiter and brighter. The waterline is the little edge between your lashes and the white of your eye. Swipe the pencil a few times into the lower waterline to build up an excess of product. Now open and close your eyes a few times to transfer the excess to the upper waterline. Voila, smokey eyes!


All of these tutorial steps can be customized by reaching out to one of our Clean Beauty Experts via our live chat on this website. They can help you choose shades, walk you through the steps of application and even share images of color swatches. Click the bubble on the lower right of your screen to start chatting!
We love seeing your artistry skills at work. Feel free to show us your gorgeous eye makeup looks on Instagram, our handle is @credobeauty.
Cheers,
Joshua